Java SE Installation Tutorial

Summary: This tutorial is about Java Development Kit (JDK) Standard Edition installation guide. After reading and executing this tutorial you will be able to install the JDK and setting the basic configuration for running the Java compiler from the command line. You will also learn how to create, compile and run a simple Hello World program written in Java.

Download The JDK

When this tutorial is written, the latest JDK is version 7 Update 45. To download the Java SE Development Kit 7 (JDK 7) click to following URL: Java SE Downloads. Make sure you choose the Windows version and download the JDK and not the JRE. The JDK installer will have the JRE included.

Installing The JDK

After downloading you will have a file called jdk-7u45-windows-i586.exe. Executing this file, either by double-click the file or running it from the command prompt, will begin the installation process. You will see the following screens during the installation process:

Installation Wizard Welcome Screen

Installation Wizard Welcome Screen

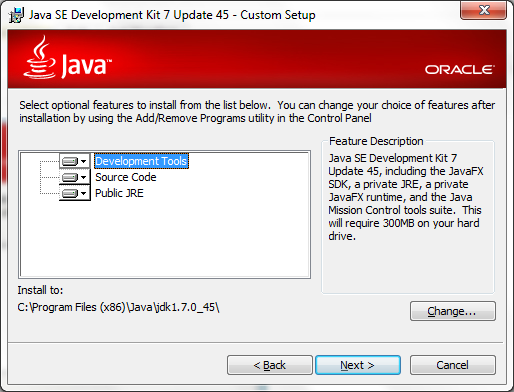
To continue the installation click the Next button shown in the screen above. This action will bring you to the feature’s selection screen in the installation wizard shown below.

Features Selection

Features Selection

In the feature’s selection screen above you will be able to choose which features to install. For the simplicity of this tutorial we will choose to install the entire features. We will also use the default installation path. In Windows operating system the default path is C:\Program Files (x86)\Java\jdk1.7.0_45. Click the Next button to continue to the next step.

Installation Progress

Installation Progress

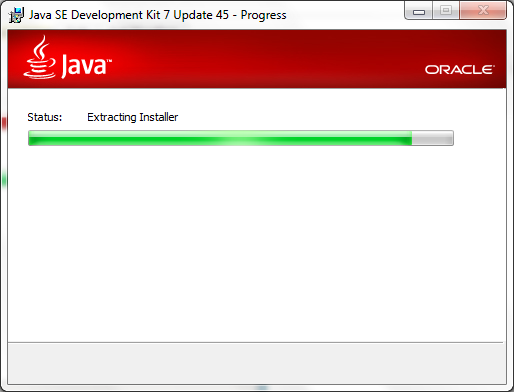
The screen above shows the progress status of the JDK installation. Depending on your computer speed this process may take a couple of minutes to finish. Wait for the next screen to show up.

JRE Installation Screen

JRE Installation Screen

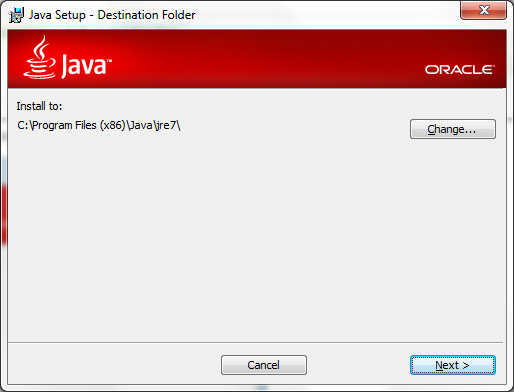
As stated above that the JRE is included within the JDK installer, the screen above show you the JRE installation wizard. We will use the default path as shown above C:\Program Files (x86)\Java\jre7. Click the Next button to continue to the next step.

JRE Installation Progress

JRE Installation Progress

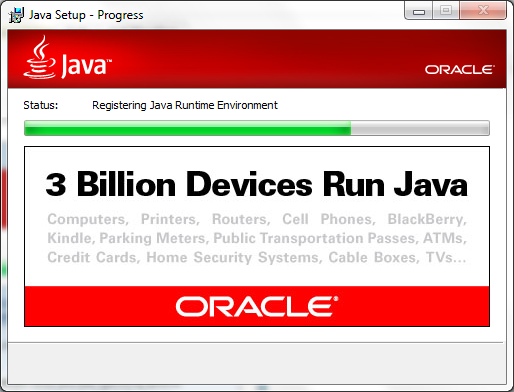
The screen above shows the status of the JRE installation. Depending on your computer speed this process may take some other minutes to complete. When the JRE installation complete you will see the next screen.

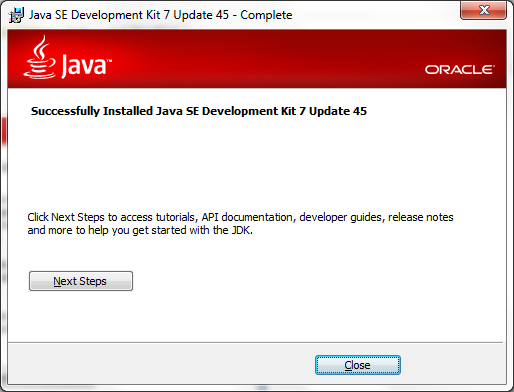
JDK Installation Completed

JDK Installation Completed

Seeing the screen above means that your JDK installation is completed. Click the Finish button to exit the installation Wizard.

Configuring The JDK

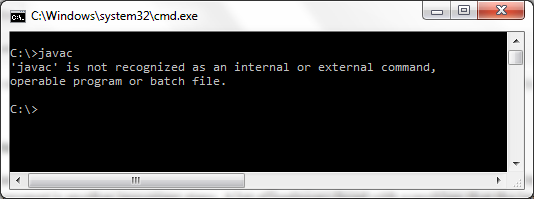
Now you have the JDK installed on your system. Configuring the JDK so that you can run the javac and java commands from the command prompt is another important steps. A lot of beginners faced with a problem that the javac command is not recognized because they did not configure the path correctly. To validate your installation type the javac command in the command prompt. At first, you will see the following screen as the command output.

javac command is not recognized

javac command is not recognized

To make the javac command run properly you need to update the PATH environment variable to include the Java binary installation path. The following steps will show you how to configure the PATH environment variable.

  • Open your Windows Explorer, you can use the Windows + E shortcut.
  • Right click on Computer icon and choose the Properties menu.
  • Click Advanced system setting from the Task list.
  • In the System Properties window choose the Advanced tab.
  • Click the Environment Variables button.
  • In the Environment Variables windows you will see two sections. User variables and System variables.
  • Find the Path variable and click the Edit button.
  • In the Edit User Variable screen, update the current variable value by adding the path to JDK bin folder, in our case the path will be C:\Program Files (x86)\Java\jdk1.7.0_45\bin;. You should add this information at the beginning at the beginning to make sure it will be picked first.
  • Press the OK button to update the User Variable.
  • Press the OK button to finish the Environment Variables setting.
  • Press the OK button on the System Properties window to close it.

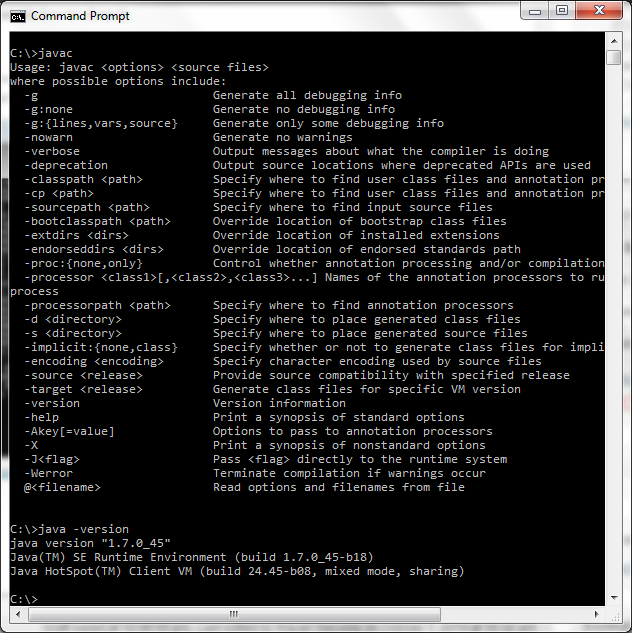
Now you can open a new command prompt window and type the javac command. You will see that the javac command is now run as expected. You can type javac -version to check the version of your JDK.

Java Command Recognized

Java Command Recognized

Creating The HelloWorld.java

Now you have the JDK installed and configured properly. Let’s now create our first Java program, the famous Hello World program. Let’s begin.

  • Open a command prompt window.
  • Create a directory C:\HelloWorld\src.
  • Go to the src directory and create another directory call program.
  • Go to the program directory.
  • Create the HelloWorld.java source file by typing notepad.exe HelloWorld.java.
  • The Notepad program will show a dialog saying that the HelloWorld.java file is not found.
  • Press the Yes button for creating the file.
  • Type the following code in the Notepad editor.
package program;

public class HelloWorld {
   public static void main(String[] args) {
       System.out.println("Hello World");
   }
}
  • Click the Save menu to save your program.
  • Click the Exit menu to exit from the Notepad program.
  • Type the dir command, and you will see that you have created a file called HelloWorld.java.

Compiling Java Source File

Up to this step you have created your first Java program. Before running the program you need to compile it. The compilation process compiles your Java source file into something called the Java bytecode. The bytecode is an intermediate language that makes the Java program portable across different platform.

To compile the program do the following step:

  • Go to the C:\HelloWorld\src\program directory.
  • Type javac HelloWorld.java to compile the source code.
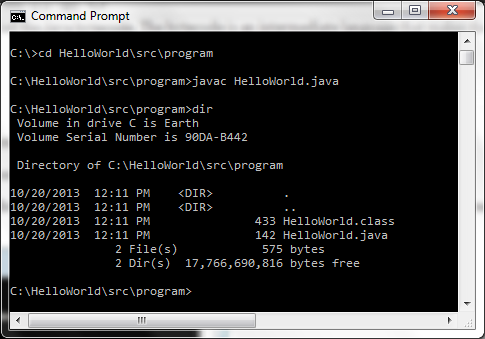
  • A successful compilation will produce a HelloWorld.class file. This class file is your binary HelloWorld program, and it is ready to be executed.
Compiling Hello World

Compiling Hello World

Running the Program

Now you are in the final step of the tutorial. Running the HelloWorld program. Here are the final step you need to run:

  • Go to the C:\HelloWorld\src directory.
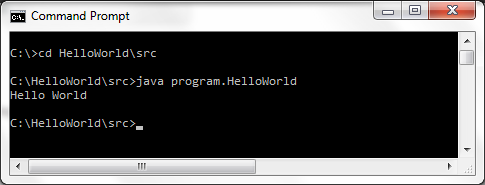
  • Type java program.HelloWorld without the .class extension to run the program.
  • You will see that the Hello World string printed on the screen.
Running Hello World

Running Hello World

That’s all for now, see you on another tutorial.

How do I create a generic Map object?

In this example of Java Generics you will see how to create a generic Map object. Creating a generic Map means that you can define the type of the key and the type of the value of object stored in the Map. The declaration and the instantiation of a generic Map is only different to other type of collection such as List and Set is that we to define two types. One type for the key and the other type for the value.

The syntax for creating a generic Map is as follows:

Map<K, V> map = new Map<K, V>();

Where K is the type of map key and V is the type of the value stored in the map. If you want a map to hold a value of reference to String object and using an Integer as the key, you will write the declaration and instantiation like the snippet below.

Map <Integer, String> map = new HashMap<Integer, String>();

To make it simpler, you can use the diamond operator too.

Map <Integer, String> map = new HashMap<>();

When you want to add some elements to the map you can use the same put() method. But you don’t have to worry that you put a wrong type of object into the map. Because the Java compiler will check it to see if you are storing a correct type. Generic will catch the bug that should not happen at runtime because the code is already validated at compile time.

Map <Integer, String> map = new HashMap<>();
map.put(1, "A");
map.put(2, "B");
map.put(3, "C");

//map.put("4", new Date()); // Compile time error!  

String a = map.get(1);
String b = map.get(2);
String c = map.get(3);

The get() method will return a value from the map that correspond with the given key. Because the map know that it store values of string, it will return a string. So you don’t need to cast the return value from the map’s get() method. You might wonder why we can put keys like 1, 2, 3. Doesn’t it supposed to be type of Integer? If you remember the auto boxing feature then you’ll understand this. Behind the screen Java will convert the primitive int to Integer.

Now, after we know how to add elements and read it back from the map. Let iterate the contents of the map. A map will have two collections that you can iterate, the keys and the values. The code snippet below will demonstrate it for you. The first snippet show you how the iterate the map using the key collections while the second iterates the values of the map.

Iterate key collections.

Iterator keyIterator = map.keySet().iterator();
while (keyIterator.hasNext()) {
    Integer key = keyIterator.next();
    String value = map.get(key);
    System.out.println("key = " + key + "; value = " + value);
}

When iterating a map using the key collection you will get the key set of the map and check the hasNext() to see if it has next key. After that you can get the key using the next() method. To get the value you call the get() method and pass the key as the argument.

Iterates value collections.

Iterator valueIterator = map.values().iterator();
while(valueIterator.hasNext()) {
    System.out.println("value = " + valueIterator.next());
}

If you want to iterate the value and ignoring the keys you can get the value collections from the map. To validate if it still holds more entries you call the hasNext() method. To obtain the value simply call the next() method from the iterator.

Notice that when using generic you don’t need to do any casting when working with generic map. Everything is added to map and read from the map is according the type of the key and the value of the map. Beside using the Iterator you can also use the for-each loop to iterate the map. Here are the version of the code above written using the for-each loop.

for (Integer key : map.keySet()) {
    String value = map.get(key);
    System.out.println("key = " + key + "; value = " + value);
}

for (String s : map.values()) {
    System.out.println("value = " + s);
}

You can choose either way that match your coding style. Both method of iterating the map object will produce the same result.

How do I create a generic Set?

In another post of Java Generics you have seen how to create a generic collection using List in this example you will learn how to make a generic Set. Making a Set generic means that we want it to only hold objects of the defined type. We can declare and instantiate a generic Set like the following code.

Set<String> colors = new HashSet<>();

We use the angle brackets to define the type. We need also to define the type in the instantiation part, but using the diamond operator remove the duplicate and Java will infer the type itself. This declaration and instantiation will give you a Set object that holds a reference to String objects. If you tried to ask it to hold other type of object such as Date or Integer you will get a compiled time error.

Set<String> colors = new HashSet<>();
colors.add("Red");
colors.add("Green");
colors.add("Blue");

//colors.add(new Date()); // Compile time error!

The code for adding items to a set is look the same with the old way we code. But again, one thing you will get here for free is that the compiler will check to see if you add the correct type to the Set. If we remove the remark on the last line from the snippet above we will get a compiled time error. Because we are trying to store a Date into a Set of type String.

Now, let see how we can iterate the contents of the Set. First we’ll do it using the Iterator. And here is the code snippet.

Iterator iterator = colors.iterator();
while (iterator.hasNext()) {
    System.out.println(iterator.next());
}

When using a generic Set it will know that the iterator.next() will return a type of String so that you don’t have use the cast operator. Which of course will make you code looks cleaner and more readable. We can also using the for-each loop when iterating the Set as can be seen in the following example.

for (String color : colors) {
    System.out.println(color);
}

How do I use for-each to iterate generic collections?

In this example you will learn you to iterate a generic collection using the for-each loop. There was actually no for-each keyword or statement in Java. It just a special syntax of the for loop. The structure or syntax of the for-each loop is as follows.

for (type var : collections) {
    body;
}

This form of for loop is always read as foreach and the colon (:) character is read as “in”. Given that definition, if the type is a String you will read the syntax above as “foreach String var in collections”. The var in the statement above will be given each value from the collections during the iteration process.

Let’s compare two codes, the first one that use a generic and another code that does not use a generic so we can see the difference from the iteration perspective when working with a collection.

package org.kodejava.generics;

import org.kodejava.generics.support.Customer;

import java.util.ArrayList;
import java.util.List;

public class ForEachGeneric {

    public void loopWithoutGeneric() {
        List customers = new ArrayList();
        customers.add(new Customer());
        customers.add(new Customer());
        customers.add(new Customer());

        for (int i = 0; i < customers.size(); i++) {
            Customer customer = (Customer) customers.get(i);
            System.out.println(customer.getFirstName());
        }
    }

    public void loopWithGeneric() {
        List<Customer> customers = new ArrayList<>();
        customers.add(new Customer());
        customers.add(new Customer());
        customers.add(new Customer());

        for (Customer customer : customers) {
            System.out.println(customer.getFirstName());
        }
    }
}

What you see from the code snippet above is how much more clean our code is when we are using the generic version of the collection. In the first method, the loopWithoutGeneric we have to manually cast the object back to the Customer type. But in the second method, the loopWithGeneric method, no cast is needed as the collection will return the same type as what the collection was declared to hold.

How do I create a generic collections?

In this example you will learn how to create a generic collections. Using a generic collections you can define the type of object stored in the collections. Most of the time when you are working with a collection you will store the same kind of object in it. So it is safer to work if you know what to store in the collection and what to expect when try to read some data from it without worried of creating a runtime error in your code because you place a wrong object in the collection.

Using the generic type mechanism introduced since JDK 5.0 you can declare a collections with reference to the given type. You define the type inside an angle brackets after the variable declaration and after the variable instantiation. In JDK 7.0 you can simplify this using the diamond operator. For example is you want to create a collection that stored Customer objects the declaration and instantiation code will look like the snippet below.

List<Customer> customers = new ArrayList<Customer>();

In JDK 7.0 you can write it without repeating the type on the instantiation part.

List<Customer> customers = new ArrayList<>();

Creating a collection object in this way will tell to compiler that you want to allow only to add objects of type Customer to be the content of the collection. It means the add method will take Customer as the argument and the get method will return Customer object. If you are trying to add for example Product object or Seller object the compiler will give you a compiled time error.

Let’s see a complete code snippet for this example:

package org.kodejava.generics;

import org.kodejava.generics.support.Customer;

import java.util.ArrayList;
import java.util.List;

public class GenericCollection {
    public static void main(String[] args) {
        List<Customer> customers = new ArrayList<>();
        customers.add(new Customer());
        customers.add(new Customer());

        //customers.add(new Product()); // Compile time error!

        // No cast operator required.
        Customer customer = customers.get(0);

        for (Customer cust : customers) {
            System.out.println(cust);
        }
    }
}

Another thing that you can see from the code above is that you don’t have to use cast operator anymore when obtaining data from the collection. On JDK prior to 5.0 version you will typically have to use the instanceof operator to see what type of object returned by the collection, and you have to cast it. You don’t have to do this anymore when using generic. You can also see how your code become simpler and more readable when you iterate through the contents of the collection object.